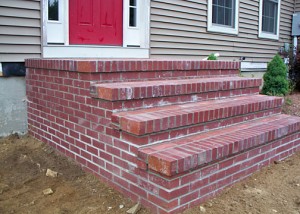
 Brick steps are a great way to make a statement at the front of your home or to transition from one area of your landscaping to another. The installation process takes time and skill, however.
First and foremost, choose a suitable area. The steps will endure a lot of pressure from walking as well as from seasonal freezing and thawing. Make sure the ground is very firm and that you’re not working over top of water or electrical lines.
When you’re ready to begin the construction process, you’ll first need to build a wooden framework. Then, pour concrete into the wooden framework, but take the time to add steel rebar to the area for reinforcement.
Note: pouring concrete can be a difficult process (and it is temperature and time sensitive), so if you are unfamiliar with pouring concrete, enlist the help of a trained professional. After the concrete is poured, level the top and allow it to cure. Once cured, remove the wooden framework.
When you are ready to begin the brick building process and not before, wet all of the bricks. This prevents them from soaking up too much mortar.
Then, lay a ½ inch thick layer of wet mortar on the area you want to brick. Do this gradually, not on the entire surface, so it doesn’t cure before you have time to add the brick.
Level each brick as you work. Leave a ½ inch space in between each brick. You can space each brick by using a brick jointer.
Pat each brick gently using a rubber mallet. You don’t want to chip the brick or move it from its place, but you do want to set it in the mortar.
Place wet mortar into each joint using a trowel. Allow the mortar to set for a few hours and then remove any excess by scrubbing. Once it has dried, you’ll be able to use a stiff brush to remove the excess.
Repeat for each section of your stairs.

